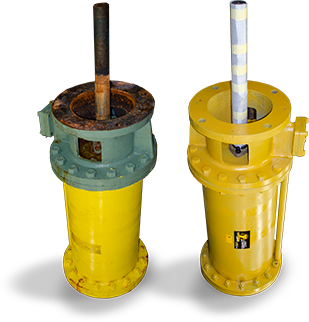
5 Important Hydraulic Cylinder Rebuild Tips
- Always Disassemble & Thoroughly Inspect Your Cylinder
- Be Sure You Have the Correct Tools
- Always Resize Your Seals
- Don’t Skip Testing
- Let a Professional Handle Your Rebuild
Pressure drops, excessive leaking, visible fractures, cracks, or dents on the piston or piston rod, broken seals, or corrosion anywhere on the cylinder are all easily-identifiable signs that a rebuild may be required. However, you’ll only know the extent of the damage once the entire cylinder is disassembled and inspected.
If a rebuild is required for your cylinder, it’s important that it’s done correctly. Mistakes during rebuilds can result in personal injuries and damage to the cylinder itself. An improper rebuild will also reduce the cylinder’s overall lifespan and cost you more money than necessary.
So, when performing a hydraulic cylinder rebuild, you’ll want to follow these five critical tips:
Tip #1: Always Disassemble & Thoroughly Inspect Your Cylinder
As mentioned earlier, disassembling the cylinder is the only way to determine whether a rebuild or small part replacement is necessary. If more than one component is failing or badly damaged, a rebuild is generally the cost-effective option.
When disassembling a hydraulic cylinder, you’ll want to drain all the oil out of it first. After you drain the oil, you can carefully disassemble the cylinder. You’ll want to inspect the cylinder barrel, cap, piston, and piston rod and thoroughly clean all surfaces.
Look for evidence of ripped hoses or pinched O-rings, snap-rings, wipers, or piston seals, as these are the most common causes of cylinder failures. Any pinched or torn seals on the piston rod can indicate that the rod might be bent.
Perform a visual inspection to identify marks, scratches, or other noticeable defects on components. Make sure to mark each one. Fatigue cracks along the cylinder can quickly lead to crack propagation once the cylinder is in use. If not identified in time, cracks can easily lead to a system-wide equipment shutdown or catastrophic failure.
If you can perform a non-destructive test like dye-penetrant inspection (DPI), then do so on each part to ensure no micro-fissures are present on the surface of any given piece.
Tip #2: Be Sure You Have the Correct Tools
Always ensure that you have the right tools and that they are in good working order. Some tools you may need for a cylinder rebuild include calibrated torque wrenches, screwdrivers, seal repair kits, rubber mallets, pliers, and lint-free clothes.
Using tools that aren’t clean or properly working can inadvertently cause damage to cylinder components. Even something as minor as a small scratch or dent on a given component’s surface can eventually lead to corrosion of that part and the entire cylinder.
Tip #3: Always Resize Your Seals
If you’ve found yourself constantly replacing a seal or O-ring, it could be due to the grooves in the seal being improperly machined, not having enough sealing clearance, or the seals themselves weren’t correctly fitted/sized.
When replacing seals, please don’t make the all-too-common mistake of measuring their current size. Seals and O-rings expand at high temperatures and shrink at low temperatures. Always base your measurements on the seal grooves for each seal and O-ring location.
Improperly fitting seals can easily lead to excess oil and fluid build-up, damaging the piston rod and bearings and potentially allowing corrosion to impact the entire hydraulic cylinder.
Tip #4: Don’t Skip Testing
One of the biggest mistakes people make when rebuilding a hydraulic cylinder is putting it back into service without testing it. Don’t make this mistake. After you’ve reassembled all components, properly test the hydraulic cylinder with new oil. The oil you use should match the hydraulic cylinder’s specifications.
The most common do-it-yourself test includes the end-of-stroke bypass test. If you follow this method, pressurize the cylinder with the new oil (not air), and then look for any oil leakage around the seal at the end of the cylinder’s stroke.
Tip #5: Let a Professional Handle Your Rebuild
One of the issues with performing a hydraulic cylinder rebuild is that several potential problems aren’t visible to the naked eye. Visual inspections can catch some defects, but not all. It takes a specific skill set and expertise to get the job done right the first time.
If you need help with a hydraulic cylinder rebuild, turn to a professional. You will save time, money, and stress this way. A professional will have the right tools, experienced technicians, and high-quality replacement components and will ensure your cylinder operates efficiently after the rebuild.
Turn to Yates Cylinders for Professional Rebuilds
Founded in 1972, Yates Cylinders is an ISO 9001-certified hydraulic cylinder manufacturer and rebuilder, serving clients in all industries. We proudly offer 24/7 hydraulic cylinder repair services and rebuilds. Since our founding, we’ve expanded our capabilities to include in-house welding, high-precision machining, and NDT testing. Every cylinder we rebuild is thoroughly cycle-tested to its original pressure rating.
Contact us today if you want to learn more about our capabilities or need to request a quote.